Last modified 01/27/2024

The temporal files are those saved files which appear when you install a new program on the computer or when you are navigating on the internet etc. the principal objective of these files is to offer a better speed when the user is about to execute a program for the second time or maybe to offer better access speed.
For example, when you visit a website some images, options etc, will be loaded immediately. But the second time you visit the same website this will not load anything and the page will open as fast as it can. Actually, the navigator opens all the data of the website from the document called temporal files, so that way it does not have to load the same data again, in consequence it just took a few seconds to enter that website.
However, this kind of service can store a lot of data on the computer time after time; it can contain images, executables, applications, texts, videos etc. when the user counts with too many accumulated files on the memory, the computer can be slower than normal because those files are using many memory’s resources. To avoid this, there are many programs created to eliminate that kind of temporal programs.
Each time you end session, the computer will take care of the temporal documents by erasing them absolutely. However it may happen that the PC was not turned off correctly and there was not enough time to eliminate all of those temporal files.
You also can use the tools offered by the internet navigator (IE8, Mozilla Firefox, etc.), for example the automatic eraser used on each session on maybe if it is the case, you can use the manual eraser. For the navigator Internet Explorer you must follow the following route: tools/ internet options/ advanced options. After doing that process, you must look for an option called “erase the temporal files document of internet when the explorer is closed” at the end of the list.
For the Mozilla Firefox explorer the route will be: tools/ options/ privacy. After that on the item “Firefox will:” you must choose the option “use customized configuration for the history”, later on the lower part you can find the option “clean the history when Mozilla Firefox is closed”.
This new configuration will erase automatically from now on the history each time you close the explorer you have been working with. But if you prefer to erase the history at any specific moment, you can do it so easily, for Firefox, by going to the eyelash tools, options and later you can choose the option “clean current history” and for the IE8, the route is: tools/ internet options/ general and later “erase”.
Another not so used way is going directly to the documents and erasing them manually. You should know that from Windows 95 (until windows 7) the TEMP file on the route C:WINDOWS, stores the temporal files and in the PREFETCH, located on the same route, stores all the session of the initiated programs.
Generally, the temporal files keep hidden inside the documents, for that reason, to eliminate them you must make them appear. In the route myPC/ tools/ file options/ watch. You should mark the option “watch all the hidden documents and files”.
Another specific way to do it may be by going to the menu start after that in execute and write %TEMP%, that way the TEMP file will appear with all the temporal documents and then they can be finally erased. Of course you must also erase those documents remaining in the virtual trash can.
The most of the temporal files have the extension .TMP and it is probable that some of them cannot be erased because they are actually being used as a support by any program. For that reason, first at all you must close every program you where working with and after that you scan initiate with the erasing process; or as final resource, you can initiate the computer on the safe mode so that way you can eliminate them easily.
Also there is another file where you can find those temporal documents, it is on the route: C: / documents and settings/ <name of the user>/ local configuration/ temp, which must be filled in with the computer’s name on the <name of the user> space. After doing that you can process to erase the files, remember about hiding the files again where those files belong to, as we mentioned before.
You can also choose the tools disk defragmentation once in a while.
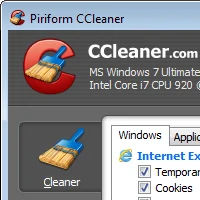
The previous whole operation can be simplified if you install a specialized program to develop that process. We actually are talking about of the famous CCleaner, which can clean the entire computer, and it has a bunch of new tools to eliminate any kind of undesired files, restoring the system, etc. the user can modify the configuration so it can proceed with the job automatically.
You can download it freely from its own website: http://www.piriform.com/ccleaner.